Showing posts with label Colours. Show all posts

Wednesday, 20 January 2016

Circling Taiwan Swirl - Majestic


Soap #29 Circling Taiwan Swirl in purples
made 10/01/2016 ready after 10/02/2016


There was a time when I didn't think I was competitive, I wasn't interested in entering competitions. In my other life as a 'longarm quilter' I started to enter competitions back in 2012 and have been quite successful. I never thought that I would enter competitions with my new hobby of soaping. I only started to make soap in the summer of 2015, yes, I went and found myself another addictive hobby.

Amy Warden of Great Cakes Soapworks is hosting an online soaping challenge, I was enticed to try it. The competition is for a soap made in a loaf shaped mould with three dividers giving four spaces for coloured soaps. I had never used this new pink liner, I made a wooden mould to make it more stable and cut some dividers to fit the liner. (See my previous post for my practice session).


For this batch I chose colours more to my liking, purples, green and yellow, pleasing to the eye
Violet mica
Magic Yellow mica
Lavender mica
Apple Green mica
Fragranced with Lavender and Litsea Cubeba essential oils


Stick blended to emulsification, ready to section off...


Coloured micas mixed in......


Colours placed in order...


After the swirling


The cut


This is the cut photo I entered into the challenge...I named it 'Majestic'


I'm really pleased how these turned out...

Circling Taiwan swirl...practice

Soap #28 Circling Taiwan Swirl, (this batch turned into a practice session)
made 09/01/2016 ready after 09/02/2016
scented with orange and patchouli essential oils


I had my butters and oils melted and went to choose my colours, these were not what I had in mind when I first opened the drawer but were what jumped out at me


Bronze Satin, New Moon Black, White Satin and Silver Graphite 


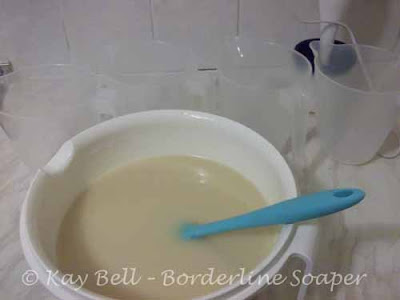
I mixed my oils, added the lye mixture, stick blended to emulsification and divided between four jugs.

I added my colours to the jugs and my essential oils to all except the white as my chosen essential oils were dark in colour and I wanted to keep the white as white as possible


I gradually poured one colour in each section of the liner bit by bit....


It all looks very tidy from this angle..


I had to work quickly at this point as my batter was thickening, this vision is not what I had planned but it had worked to a fashion. I now had to wait and wait till unmoulding.....I really wanted to make another batch right there and then but had to wait until this mould and liner were free again....


I was pleased that the loaf unmoulded so well from this new liner, the liner is thicker and not quite as flexible as my others but there wasn't a problem


Trying out my new cutter, I know it hasn't been sanded or varnished yet but will be soon...


I cut this loaf so that I had as many 2.5 inch blocks as possibly making sure that both end cuts are the correct measurement any extra was left in the middle.


Each block is then cross cut through the middle like this one.


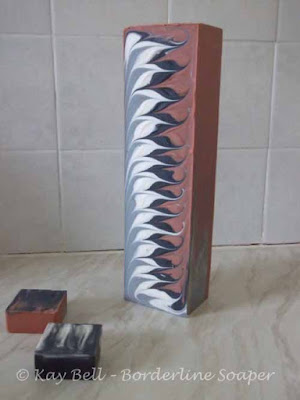
So this is the cut that shows a water lily...the bronze turned out to be a little darker than I had expected.


I know far too may photos....

Before this loaf was even cut I had made up another batch in different colours...

Thursday, 22 October 2015

First time using an FO!

Fragrance Oil that is.....seems simple at first but anything you add to your soap can change the texture, colour or fragrance in ways that you would never initially think.

Soap 9.... made 10/10/2015, ready 10/11/2015
The Fragrance oil I used for this soap is named Irish Cream, reminiscent of the famous Bailey's! It really does smell like that, there is also a creamy sweetness there too and although I didn't really read up on the contents of the fragrance I knew there had to be vinallin/vanilla in there that would probably morph the colour of the soap anything from a dark cream to a dark brown so I thought I would play with that concept and see where it would lead.

 In the bowl are my hard oils, (left to right around that) water, lye, fragrance oil sample, colloidal oats, titanium dioxide and soft oils.

Water and lye mixture added to the hard oils and melting....

                             
Apart from the oats, these are the only additives, fragrance oil and titanium dioxide then for the top, gold mica and glitters.

After adding the soft oils and splitting off into three sections, jug with spatula has only TD, no fragrance, jug on the right has only fragrance, first layer in the mold has the oats and the fragrance, take notice of the colour of the soap batter.

In the mold top decorated with swirls and some extra bars on the left.

After 24 hours I unmolded and left to dry for another 24 hours

Cutting the bar, the first slices show the colour inside....I would have loved if the soap had stayed that colour....


But look what happens when the bars are left to dry....remember the only 'colour' addition is the TD which is actually not a true colour but white to make a distinction in the creamy white colours and swirls.

The bottom layer of colloidal oats for exfoliation can also be clearly seen...

I like the effect, shame I only had a sample size fragrance to play with and I used most of it here , maybe I'll get some more and play a little more with different percentages of fragrance in the layers next time.


So many soaps so little time.....smells good enough to eat too, even though it's dark I still like it!

Monday, 5 October 2015

Session 4 Still learning...

I've been cleaning out some cupboards and came across a box of essential oils that I previously used for making 'buzz off' spray for the horses, to keep those pesky horse flies at bay.  There's tea tree, eucalyptus, lavender, citronella and emulsifant, I could make 'buzz off' soap but that time of year has passed for us, so I guess these oils can be moved to the soaping cupboard to flesh out my soaping resources.


Being of frugal mind I reheated some planed and end pieces from previous clean up soaping sessions, I love the resulting two small bars they remind me of natural marble or granite. I had the notion to replicate these bars in a soaping session sometime soon. 


Soap 7...First Batch 29/09/2015

In session four my soap recipes included Coconut oil, Cocao Butter, Olive oil, Palm oil, Castor oil and the added luxury of Avocado oil and Mango butter along with Tea Tree and Lavender Essential oils.


 My soap top had mica dribbles and textures in silver, purple, white and black.

 In the end this batch accelerated quickly so I didn't get to play too much but it smells devine


I did mange to achieve a great texture to the top of the soap and also made blue cheese, that's really cool now I just wish I hadn't sectioned off the batter and had the blue cheese right through the bar, that would have been interesting...

Update 24/10/2015
Min net weight 130gms


Soap 8....Second Batch 03/10/2015


I let the lye mixture melt the solid oils this time, it's actually quicker than melting the oils in the microwave as you don't have to wait for the lye and oil to come to the same temperature.


Just need to cut the cocao butter into smaller pieces next time as that one oil is harder and takes longer to warm up.


All melted and smooth, photo after adding the liquid oils....


Colours used, titanium dioxide, purple, tropical green, silver and black along with Eucalyptus and Orange Essential oils blended with Kaolin clay.


Sorry, photos are a little shadowed, it was late Saturday night, I ended up rushing a little to get it done....


After around 18 hours I unmolded and left to dry off and cure for another two or three hours before cutting.

These are heavy bars weighing between 185-200grams (6.5-7oz) before curing, it will be interesting to see how much weight is lost through evaporation.


I made confetti soap and mixed it throughout the top layer.... my drop swirl in the bottom looks a little muddy but that was maybe the eucalyptus oil or the added Kaolin clay causing acceleration, which in turn made me a little flustered and rushed....


Used one of my new stamps from Omar Lopez, but only on one side.

Of course this is still not the marble colour or texture that I was talking about so I guess I will have plenty more opportunities to play again when I have more time to follow my plan....that will be fun...

I was given a lovely new soap display stand for my Birthday, it's just perfect to allow soap to carry on and cure....

Update 24/10/2015
Min net weight 175gms